Button mushrooms are a popular ingredient in many dishes, and growing them at home can be a fun and rewarding experience. While there are many kits available for purchase, it is also possible to grow button mushrooms without a kit. With a few simple steps and some basic materials, anyone can grow their own button mushrooms at home.
To get started, it is important to obtain high-quality mushroom spawn. This can be sawdust, grain, or plug spawn, and can be purchased from a variety of sources. A growing medium such as straw, wood chips, or compost is also needed. The spawn is mixed with the growing medium and filled into containers or bags. The mixture is then kept in a dark, warm, and humid environment to allow the mushrooms to grow.
While growing button mushrooms without a kit may take a bit more effort than using a kit, it can also be more rewarding and cost-effective. By following the steps outlined above and using the proper materials, anyone can successfully grow their own button mushrooms at home.
Understanding Button Mushrooms

Species and Characteristics
Button mushrooms, also known as Agaricus bisporus, are one of the most commonly cultivated mushrooms worldwide. They are part of the Agaricaceae family, which includes other edible mushrooms such as portobello and cremini. Button mushrooms are small, white or brown, with a cap that can grow up to 4 inches in diameter. They have a mild, earthy flavor and a firm texture, making them a popular ingredient in many dishes.
Growth Requirements
Button mushrooms require specific environmental conditions to grow successfully. They prefer a temperature range between 60-70°F and a high humidity level of 85-90%. The growing medium should be rich in organic matter, such as compost, straw, or wood chips. The pH level of the growing medium should be between 6.0 and 7.5.
To grow button mushrooms without a kit, one needs a high-quality mushroom spawn, such as sawdust, grain, or plug spawn, and a growing medium. The spawn is mixed with the growing medium and filled into containers or bags. The containers or bags should be kept in a dark, humid environment with proper ventilation. The mushrooms will start to develop after a few weeks and can be harvested when the caps are fully formed.
In summary, button mushrooms are a popular and easy-to-grow mushroom species that require specific environmental conditions and a nutrient-rich growing medium. With the right equipment and knowledge, anyone can grow button mushrooms without a kit.
Preparing the Growing Medium

Growing button mushrooms without a kit requires a suitable growing medium. The substrate is the material that the mushrooms grow on, and it must be nutritious, moist, and sterile. Here are the steps to prepare the growing medium:
Selecting the Substrate
Button mushrooms can grow on various substrates, including straw, compost, sawdust, and other organic materials. The most common substrate is a mixture of horse manure and straw. The horse manure provides nutrients, and the straw provides structure and moisture retention. Compost is another option, but it must be well-aged and free of contaminants.
Sterilization Process
Sterilizing the substrate is crucial to eliminate any bacteria, fungi, or other microorganisms that could compete with the mushrooms. The easiest way to sterilize the substrate is to use a pressure cooker or an autoclave. The substrate must be moistened and packed into bags or containers before sterilization. The pressure and time required for sterilization depend on the substrate and the equipment used. A typical sterilization cycle lasts for 90 minutes at 15 psi.
After sterilization, the substrate must be cooled down to room temperature before inoculation. The bags or containers must be sealed with a filter patch to allow gas exchange but prevent contamination. The substrate is now ready for inoculation with mushroom spawn, which is the mycelium of the mushroom. The mycelium will colonize the substrate and form fruiting bodies, which are the mushrooms.
Spawning and Inoculation
Spawn Preparation
Before starting the process of spawning and inoculation, it is essential to prepare the spawn. Spawn is the material that contains the mycelium, which is the vegetative part of the mushroom. The spawn can be prepared using various materials such as grain, sawdust, or plug spawn. One can also purchase pre-made spawn from a reliable supplier.
To prepare the spawn, one needs to sterilize the material to eliminate any bacteria or other contaminants that may hinder the growth of the mushroom. The sterilization process can be done by boiling, pressure cooking, or using a microwave. After sterilization, the material is cooled and then inoculated with the mushroom spores.
Inoculation Technique
Inoculation is the process of introducing the mushroom spores into the spawn material. There are various inoculation techniques, and the most common ones are the grain and sawdust spawn. The grain spawn technique involves mixing the mushroom spores with sterilized grains such as rye or wheat. The mixture is then incubated until the mycelium colonizes the grains.
On the other hand, the sawdust spawn technique involves mixing the mushroom spores with sterilized sawdust. The mixture is then packed into bags or jars and incubated until the mycelium colonizes the sawdust.
After the spawn is prepared and inoculated, it is ready to be used to grow the mushrooms. The spawn can be added to a substrate such as straw or compost, and the mushroom will grow from there.
Overall, the process of spawning and inoculation is crucial in growing button mushrooms without a kit. With proper preparation and technique, one can successfully grow mushrooms at home without a kit.
Caring for the Mycelium
Button mushrooms are grown from mycelium, which is the vegetative part of a fungus. Once the mycelium has colonized the substrate, it will begin to produce fruiting bodies, which are the mushrooms that we eat. In order to ensure a healthy and bountiful harvest, it is important to care for the mycelium properly.
Temperature and Humidity Control
Mushrooms grow best in conditions that are cool and humid. The ideal temperature for button mushrooms is between 60 and 65 degrees Fahrenheit, while the ideal humidity level is around 85%. In order to maintain these conditions, it may be necessary to use a humidifier or mist the growing area regularly.
It is also important to keep the temperature and humidity levels consistent throughout the growing process. Fluctuations in temperature or humidity can stress the mycelium and lead to poor fruiting.
Contamination Prevention
One of the biggest challenges in growing mushrooms is preventing contamination. Contamination can occur when unwanted microorganisms, such as bacteria or mold, colonize the substrate. Once contamination occurs, it can be difficult to control and may result in a failed harvest.
To prevent contamination, it is important to maintain a clean and sterile growing environment. This can be achieved by using sterile equipment, washing hands and wearing gloves, and sterilizing the substrate before inoculation. It is also important to keep the growing area free from dust and debris, as these can harbor unwanted microorganisms.
In addition to these measures, it is also important to monitor the mycelium for any signs of contamination. If contamination is detected, it may be necessary to remove the affected substrate and start over with a fresh batch.
By properly caring for the mycelium, growers can ensure a healthy and bountiful harvest of button mushrooms. Maintaining consistent temperature and humidity levels, as well as preventing contamination, are key factors in achieving success.
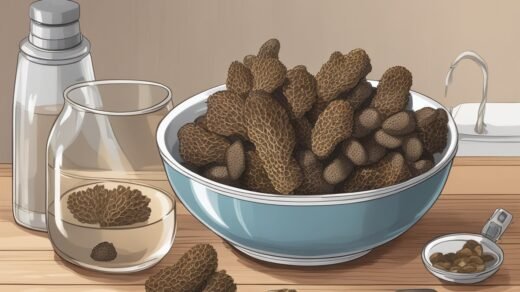
Harvesting Mushrooms
Harvesting Time
Button mushrooms are ready to be harvested when the caps are fully formed and the veil underneath the cap starts to break. This typically occurs around 3-4 weeks after the mushrooms first appear. It’s important to harvest the mushrooms before the caps start to flatten out and the veil tears completely, as this will result in a lower-quality mushroom.
It’s recommended to harvest the mushrooms when they are still young and firm, as they will have a better texture and flavor. Once the mushrooms have reached the desired size, they should be gently twisted and pulled from the substrate. It’s important to avoid damaging the surrounding mushrooms or the substrate during the harvesting process.
Post-Harvest Handling
After harvesting, the mushrooms should be cleaned and stored properly to ensure their quality and freshness. The mushrooms should be gently wiped with a damp cloth to remove any dirt or debris. It’s important to avoid washing the mushrooms with water, as this can cause them to become slimy and lose their flavor.
Once the mushrooms have been cleaned, they should be stored in a cool, dark place with good ventilation. They can be stored in a paper bag or airtight container in the refrigerator for up to a week. It’s important to avoid storing the mushrooms near foods with strong odors, as they can absorb the flavors and odors of other foods.
In summary, harvesting button mushrooms requires careful attention to timing and technique. By following these guidelines for harvesting and post-harvest handling, you can ensure that your button mushrooms are of the highest quality and flavor.